
A new fence should protect your property, not leave you wondering who’s responsible if something goes wrong. Before work begins, I check the contractor’s insurance to understand whether they have coverage for common job-site risks.
I ask for a certificate of insurance and check that the contractor’s details, policy dates, and coverage fit the project. I also review policy limits and exclusions and ask whether subcontractors are covered. These checks can help me approve the work with fewer surprises.
Fence contractor insurance can help me understand whether a crew is prepared for the risks of working on my property. General liability insurance may apply if installation work accidentally damages a garage, landscaping, or a neighboring structure. Workers’ compensation may cover eligible job-related injuries to employees, while commercial auto insurance may apply if a work vehicle is involved in an accident while hauling materials or equipment. Coverage and requirements vary, so I ask which policies the contractor carries before work begins.
When I review the coverage, I make sure it fits the work planned at my property, not just the contractor’s general business operations. I ask for a certificate of insurance, check that the contractor’s name and policy dates are current, and confirm that the listed policies are relevant to the project. If subcontractors will be on site, I ask how their coverage is handled too. These checks help me feel more confident before approving the job.
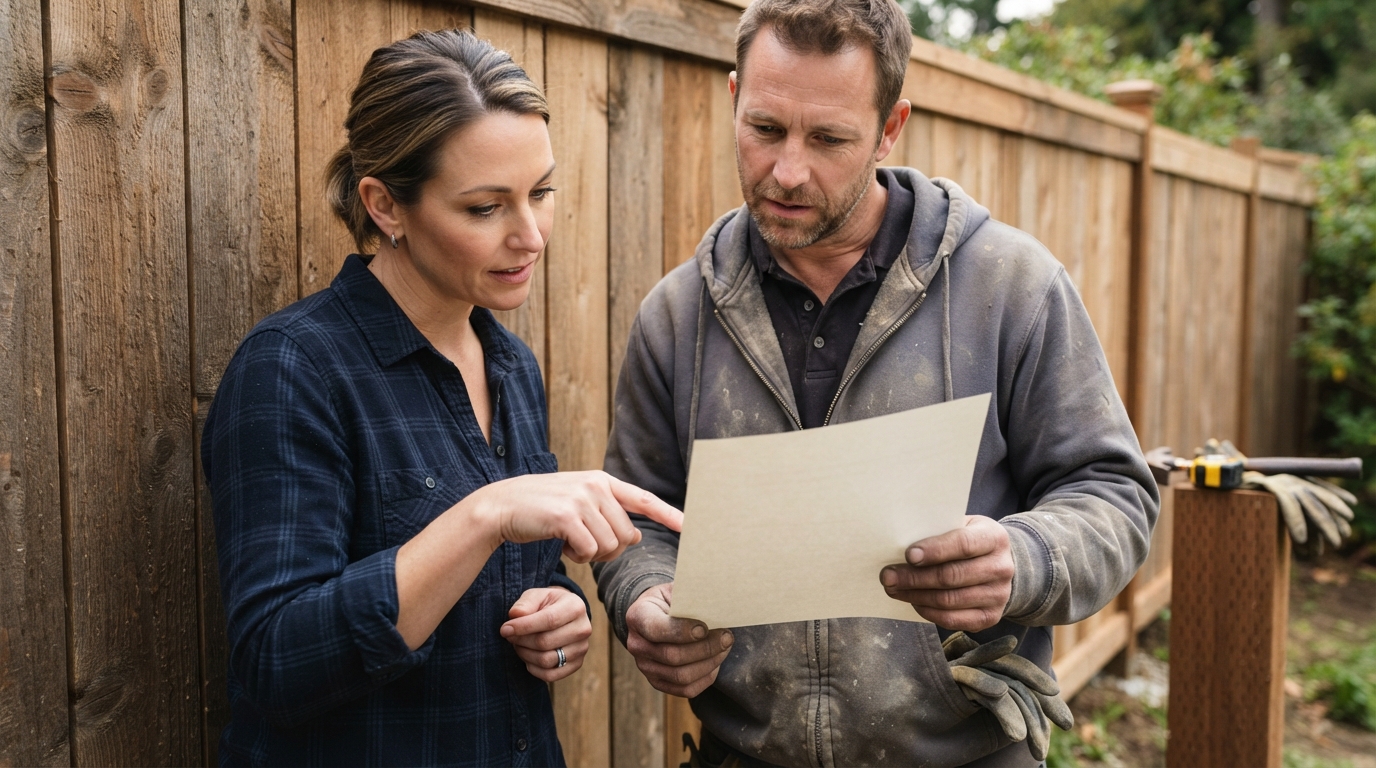
I ask the contractor for a current certificate of insurance before work begins. I check that the business name matches the company I’m hiring, including any listed trade name, and that the policy dates cover the planned project. The certificate should show coverage that fits the work, such as general liability and workers’ compensation when applicable. I also make sure the details are current and that the contractor’s crew or subcontractors are accounted for.
A certificate is a snapshot of coverage, not the insurance policy itself. If something is unclear or the job carries added risk, I confirm the details. For example, I might verify that the policy is active during the installation dates or ask whether it meets a specific property or project requirement. I contact the insurer using contact information I’ve verified independently, and ask the contractor to authorize the check if needed. If names, dates, or coverage details don’t line up, I pause before approving the work and request clarification.
Policy limits matter because a small claim and a serious injury can involve very different costs. I check the per-occurrence limit, which applies to a covered incident, and the aggregate limit, which is the most the policy may pay during its term. I also ask whether the policy has exclusions that could affect fence work, such as damage to underground utility lines or property being worked on. A certificate of insurance gives me a useful summary, but it may not show every exclusion or condition.
I ask how the contractor handles subcontractors, since the crew on site may include workers who aren’t the contractor’s employees. I find out whether subcontractors carry their own liability and workers’ compensation coverage, and who is responsible if their work causes damage or someone is injured. If an answer is unclear, I ask the contractor or insurer to explain how the policy applies to this specific job. These questions help me decide whether the coverage fits the work before I approve the project.

Before I approve a fence project, I ask the contractor to confirm that their fence contractor insurance is active and suitable for the work planned at my property. I request a current certificate of insurance and check that the business name, policy dates, and coverage details match the contractor I’m hiring. I also ask whether the policy will remain active throughout the project. If anything is unclear, I contact the insurer to confirm the details rather than relying on a verbal assurance. These simple checks help me understand who may be covered if an incident happens on site.
I also ask whether workers are covered by workers’ compensation and how insurance applies to any subcontractors on the job. If subcontractors will be involved, I find out whether they carry their own coverage or are included under the main contractor’s policies. Then I request a project estimate that describes the fence work and who will perform it, so I can compare the job details with the coverage information. A clear estimate and verified insurance give me a more complete picture before I schedule the work. The estimate helps define the project, while insurance verification helps me make a more informed hiring decision.
Before work begins, I recommend asking for a current certificate of insurance and checking that the contractor’s name, policy dates, and coverage details match your project. Confirm that the policies and limits are appropriate for the work, and ask how subcontractors are covered if they’ll be part of the crew. If anything is unclear, contact the insurer to verify the information directly. Taking a few minutes to check these details can help you feel more confident about who is working on your property.
Insurance is one part of choosing a fence contractor. I also compare qualified providers based on their experience, project approach, and communication. I ask questions, review the documentation, and make sure I understand what the contractor will handle before approving the job. When I’m ready, I request a quote for my fence project and share the details needed for an accurate estimate.
Fence contractor insurance may include general liability, workers’ compensation, and commercial auto coverage. General liability may apply if installation accidentally damages your property or a neighboring structure, while workers’ compensation may cover eligible job-related employee injuries. Commercial auto may apply to accidents involving work vehicles.
Checking insurance helps me understand whether the contractor has coverage for common risks at my property. I recommend reviewing it before approving the job so you can spot gaps, confirm the coverage fits the planned work, and ask questions before the crew arrives.
Check that the business name matches the company you’re hiring, including any listed trade name, and that the policy dates cover your project. Review the listed policies and limits, and confirm they’re relevant to the fence work. A certificate is a useful starting point, but ask the contractor or insurer to clarify anything that’s unclear.
Not by itself. A certificate summarizes insurance information, but it may not show every exclusion or detail that affects a particular job. Ask the contractor to confirm that the coverage applies to the planned work, and contact the insurer if you need clarification.
Workers’ compensation may cover eligible job-related injuries to employees, but coverage can depend on the policy and the worker’s status. Ask whether the contractor carries it and how coverage applies to anyone working on your project. Requirements vary by location.
Ask whether subcontractors will be on site and how their insurance is handled. Find out whether each subcontractor has relevant coverage, such as general liability and workers’ compensation when applicable. Confirm this before work begins so you understand who is responsible for the crew’s coverage.
There isn’t one limit that fits every fence project. Consider the size and risks of the work, then review the contractor’s policy limits and exclusions with them. If the limits or terms are unclear, ask the contractor or insurer to explain how they apply to your project.
Fence removal usually costs between $3 and $8 per linear foot, with many standard projects totaling about $300 to $750. I’ve found that the final price depends on more than fence length. Concrete footings, heavy materials, limited access, and debris hauling can all increase the bill. Understanding these factors can help you avoid surprises before work begins.
A simple wood fence may be quick to remove, while posts set in concrete or bulky metal panels can require extra labor and equipment. Disposal may be included in the quote or charged separately. If you are installing a replacement fence, removal is often included in a broader per-foot price. A clear breakdown of labor, hauling, and additional charges makes it easier to compare estimates.
Professional fence removal usually costs about $3 to $8 per linear foot for a standalone job. A typical project falls between $300 and $750, depending on the fence size and local labor rates. As a quick estimate, removing 50 linear feet may cost $150 to $400, while 100 feet may run $300 to $800. A 150-foot fence could cost roughly $450 to $1,200, especially if the posts are set in concrete or access is limited.
I also consider the fence material and how the debris will be handled after removal. Wood, chain-link, vinyl, and metal fences require different tools and levels of labor. Concrete footings may add around $150 to $250 for digging or equipment. Hauling and disposal may cost extra, with debris removal often adding about $60 to $600 depending on the volume. Fences on slopes, behind gates, or near landscaping may also take longer to dismantle and carry away.
If removal is bundled with disposal or a new fence installation, the combined price may reach $5 to $20 per linear foot. This broader range can include tearing out the old structure, loading debris, preparing the site, and installing the replacement fence. I recommend asking for an itemized estimate so you can confirm whether disposal, concrete removal, grading, and site preparation are included. Comparing the full project scope, rather than only the removal rate, makes it easier to plan your budget.
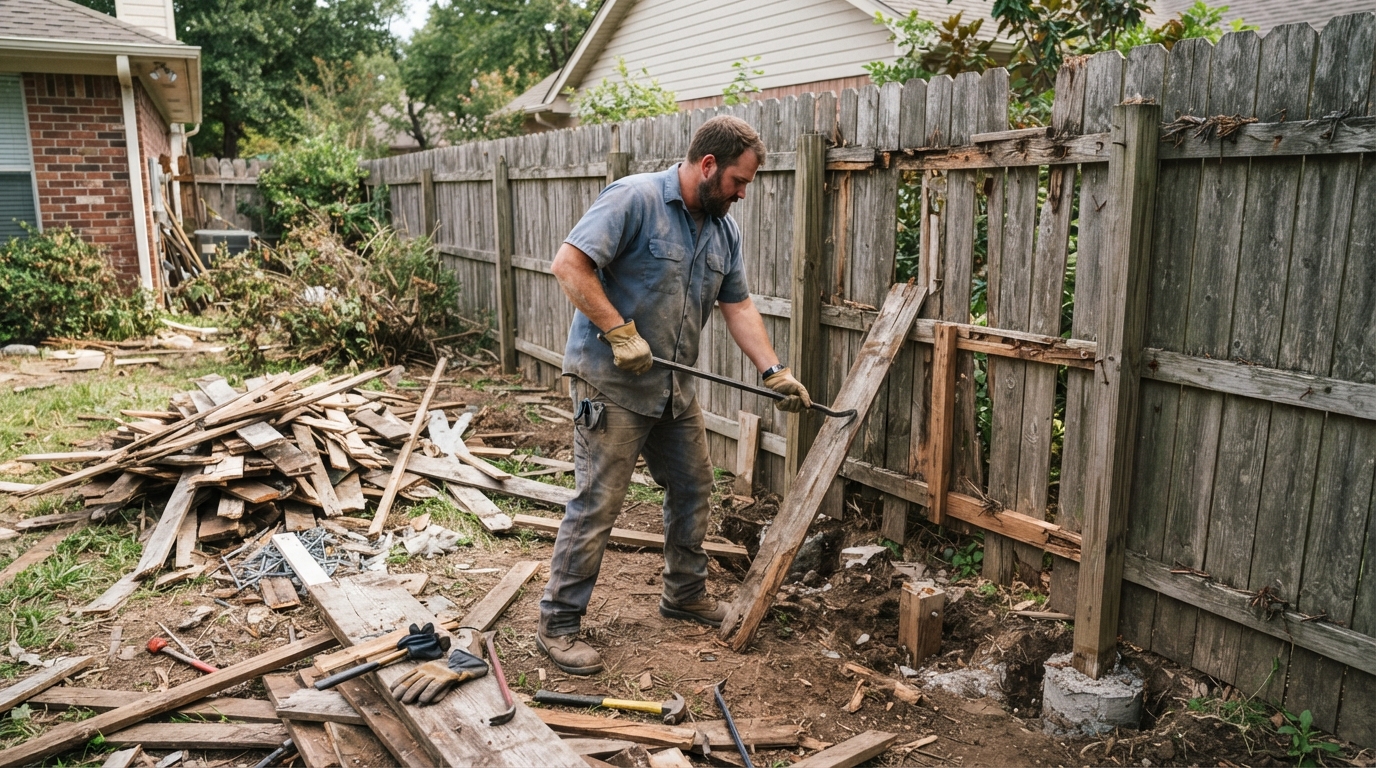
Fence removal commonly costs between $3 and $8 per linear foot for a standalone professional job. Most smaller projects cost around $300 to $750, but the final price depends on more than the fence length. Wood and chain-link fencing often costs less because crews can cut, pull, and load the sections with standard tools. Metal fencing, masonry walls, and heavily anchored posts usually take more time and may require specialized equipment. If removal is bundled with a replacement fence, the combined work may cost about $5 to $20 per linear foot, depending on the full scope.
The fence material, height, and total length are the first details I use to estimate the work. Taller or heavier panels require more workers to handle, while longer runs increase labor, hauling, and disposal costs. Access matters too. A fence beside a driveway is easier to remove than one behind a house, down a slope, or in a narrow side yard. Buried posts and concrete footings can add significant labor, especially when they must be dug out instead of cut below grade. Concrete post removal or special equipment may add roughly $150 to $250 to the project.
I also check whether the fence can be removed in sections or must be dismantled piece by piece. Rusted fasteners, dense landscaping, steep ground, and limited space can slow the crew and increase labor costs. Disposal is another item to confirm. Hauling panels, posts, and broken concrete may be priced separately, with debris removal often adding about $60 to $600. Before work begins, I recommend asking for an estimate that clearly separates removal, footing work, equipment, hauling, and site cleanup. This makes it easier to compare options and plan the cleared area for a new fence or another project.
When I calculate fence removal costs, I separate labor from disposal and site preparation. Professional removal often runs about $3 to $8 per linear foot, with many standard projects landing between $300 and $750. Some quotes include hauling, landfill fees, recycling, and basic cleanup, while others charge for these items separately. I recommend asking whether the price covers loading and transport, disposal fees, nails and small debris, and a final sweep of the work area.
Concrete footings and buried posts can raise the total because they require more labor and may need special equipment. Removing concrete posts or stubborn footings may add roughly $150 to $250, while a separate junk-hauling charge can range from about $60 to $600 depending on the volume. Wood, metal, and vinyl may also have different recycling or disposal costs, especially when materials are mixed. If you are replacing the fence, bundling removal and disposal with installation may cost about $5 to $20 per linear foot, depending on the scope.
After the fence is gone, I check whether the property needs post extraction, debris removal, hole filling, grading, or other cleanup before the new fence goes in. Pulling posts can leave uneven soil or open holes, and heavy equipment may leave ruts that need to be leveled. Ask for these tasks to be listed in the quote so you are not surprised by added charges later. A clear fence removal estimate should show what is included and leave the site ready for the next phase of your project.
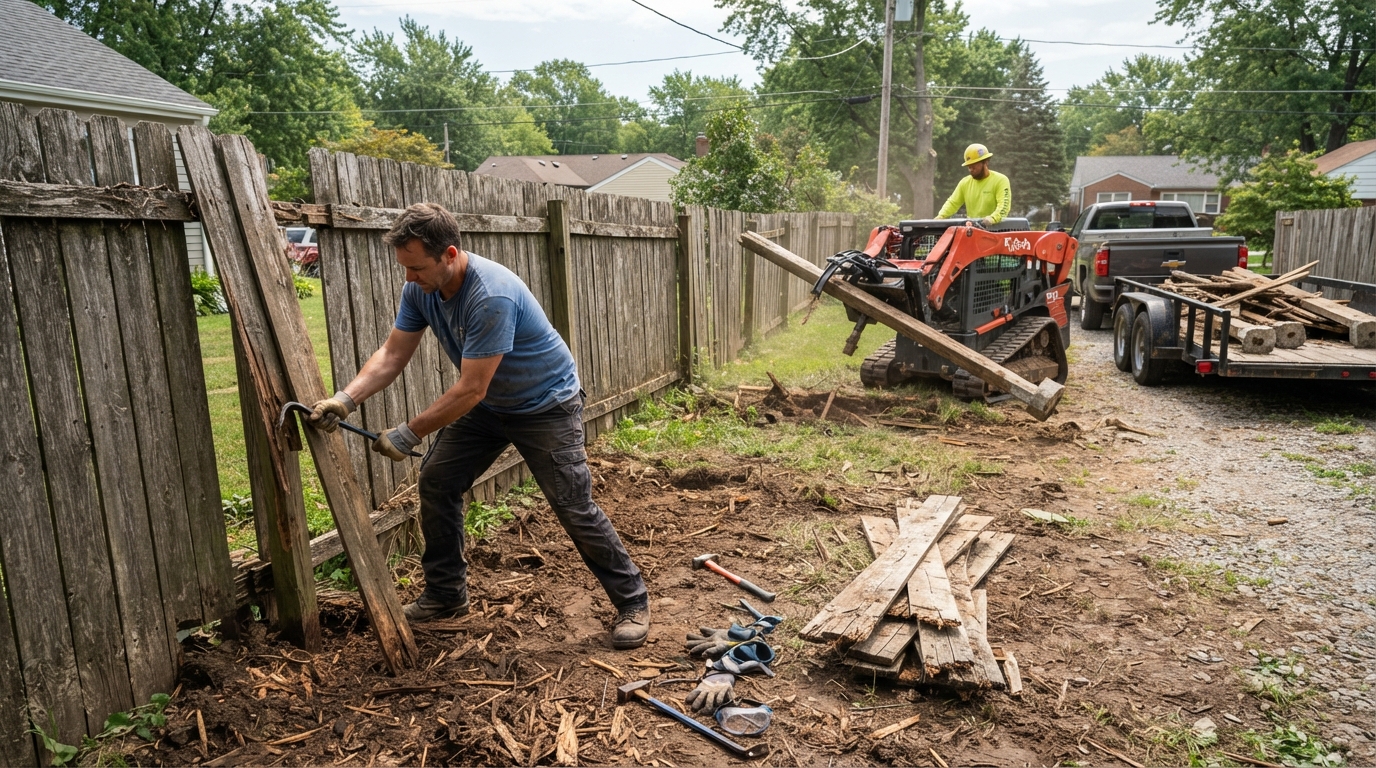
Removing a fence yourself can save on labor, but the savings may not be as large as they seem. You may still need to rent a post puller, reciprocating saw, trailer, or other tools. Disposal can add roughly $60 to $600 depending on the amount and type of debris. For a small wood fence with easy access, DIY removal may be practical if you have help and enough time. I would also check for buried utility lines, wear gloves and eye protection, and plan where every post, panel, and piece of concrete will go before you start.
Professional fence removal commonly costs about $3 to $8 per linear foot, or roughly $300 to $750 for a typical standalone project. The price can increase when the fence is large, difficult to access, made from heavy materials, or requires separate hauling. Concrete footings are another major factor. Pulling or breaking them out may require special equipment and can add about $150 to $250. In my experience, professional removal is often worthwhile when posts are deeply set, the fence is close to structures, or the site has limited room for equipment and debris.
If you plan to install a replacement fence, ask for removal, hauling, footing removal, and site preparation as one project quote. Bundling the work may cost about $5 to $20 per linear foot, depending on the materials and installation scope. It can also leave the ground ready for new posts. I would choose professional removal when you need the area cleared quickly, want to avoid disposal problems, or need old concrete removed cleanly for the new layout. DIY removal can make sense for a short, accessible fence, but professional help is usually safer and more efficient for larger or more complicated projects.
For most professional projects, I’d budget about $3 to $8 per linear foot for standalone fence removal, with many typical jobs costing between $300 and $750. Removal bundled with a replacement fence may run closer to $5 to $20 per linear foot because it can include demolition, hauling, site preparation, and installation. A small, accessible wood fence may cost less, while chain-link fencing, masonry, buried posts, concrete footings, steep slopes, and limited access can raise the total. Concrete post removal or special equipment may add roughly $150 to $250, and debris hauling can add another $60 to $600 depending on the load. These ranges provide a starting point, but the fence condition and work required at your property will determine the final cost.
When I request quotes, I ask for separate prices for demolition, disposal, cleanup, and preparation for the replacement fence. This makes it easier to compare estimates and identify fees that may be hidden in a single lump sum. I also confirm whether the quote includes removing posts and concrete, loading debris, hauling materials away, leveling the area, and filling open holes. If a new fence is part of the project, I ask for removal and installation to be shown as separate line items. A detailed quote helps you plan your budget and provides a clear starting point for the next phase of your project.
I typically charge about $3 to $8 per linear foot for professional fence removal. Most standard projects cost around $300 to $750, but the total can increase with concrete footings, difficult access, heavy materials, or debris hauling.
Removing 50 linear feet usually costs about $150 to $400, while 100 feet often runs $300 to $800. A 150-foot fence may cost roughly $450 to $1,200, especially when posts are set in concrete or materials must be carried a long distance.
Yes. The material affects both labor time and disposal costs. Wood and chain-link fences are often simpler to dismantle, while vinyl panels, heavy metal sections, and reinforced posts may require extra tools, workers, or equipment.
Concrete footings can add about $150 to $250 to the project. I may need to dig around each post, break apart the concrete, or use specialized equipment, so I always include the footing condition in the estimate.
Not always, so I recommend checking the quote carefully. Debris hauling and disposal can add about $60 to $600, depending on the fence volume, material, disposal fees, and distance to the facility.
Limited access, steep slopes, locked gates, dense landscaping, and nearby structures can all increase labor time. When workers cannot bring equipment close to the fence or must carry debris by hand, the removal price usually goes up.
Often, yes. When removal, disposal, site preparation, and replacement installation are bundled together, the total may range from $5 to $20 per linear foot, depending on the new fence and the preparation required.
I recommend measuring the fence length, identifying the material, and noting whether the posts are set in concrete. Ask for a written breakdown that separates removal, labor, hauling, disposal, equipment, and site preparation so you can compare estimates fairly.
A fence can look perfect on installation day and still lead to an expensive repair later. That’s why I always recommend reviewing the fence warranty before signing a contract, not after something cracks, fades, rots, or starts leaning. A “lifetime” warranty may cover only defective materials, while labor, installation problems, maintenance, and storm damage are often excluded.
I look closely at who provides each warranty, how long it lasts, what it excludes, and whether it transfers to a future homeowner. Understanding the difference between manufacturer coverage, installer workmanship protection, and your legal rights can help you avoid surprises and protect your investment.
Fence warranty coverage can protect your investment, but I always recommend looking beyond the word “lifetime.” A manufacturer’s warranty generally covers defective materials or manufacturing problems, such as premature cracking, rotting, peeling, or broken components. It may not cover damage from storms, accidents, poor maintenance, normal aging, or unauthorized changes. In some cases, coverage is prorated or transferable only once, so the exact terms matter.
Installation protection is usually handled through a separate workmanship warranty from the installer. This coverage may address problems such as leaning posts, loose gates, uneven sections, or other issues caused by improper installation. However, it often lasts for a much shorter period than the material warranty. Labor may also be excluded from a manufacturer’s warranty, even when the product qualifies for replacement. I suggest asking who handles removal, delivery, and reinstallation costs before signing a contract.
Before choosing a provider, I would request a written proposal that clearly identifies the material warranty, workmanship guarantee, exclusions, duration, maintenance requirements, and transfer rules. Ask what happens if a claim is approved and whether you must register the product or report problems within a specific time. State law may also provide implied warranty rights, even when written coverage is limited, but those rules vary. A clear, service-specific guarantee helps you compare providers confidently and avoid surprises later.

Manufacturer fence material coverage generally protects you against product defects, not every problem that can happen after installation. Depending on the material, the warranty may address premature rot, cracking, peeling, corrosion, excessive fading, or structural failure caused by a manufacturing defect. Coverage can vary for wood, vinyl, composite, aluminum, and steel fencing, so I recommend reviewing the actual warranty before approving the project. A written warranty should clearly identify the covered materials, required maintenance, claim process, and exclusions. This gives you a clearer picture of the protection you are receiving.
Coverage periods commonly include 25 years, 30 years, or limited lifetime protection. However, “lifetime” usually applies only to the product and may not cover labor, removal, disposal, or reinstallation costs. Some warranties are prorated, meaning the available benefit decreases as the fence gets older. Transfer rules may also limit coverage when the property changes ownership. Damage from improper installation, neglect, storms, accidents, or unauthorized modifications is commonly excluded as well. I consider these details important because the length of a warranty matters less than what it actually pays for.
Manufacturer coverage is separate from an installer’s workmanship guarantee, which usually addresses issues such as loose posts, misaligned sections, or installation-related failure for a shorter period. Before choosing a provider, I recommend asking for both protections in writing and confirming who handles a claim. Your proposal should state the manufacturer, product line, coverage term, maintenance requirements, and whether labor is included. It should also explain any service-specific guarantees offered for the installation itself. Taking a few minutes to compare these terms can reduce surprises and help you choose with greater confidence.
An installer workmanship warranty protects you from problems caused by the installation itself, rather than defects in the fence materials. For example, it may cover poor alignment, loose hardware, uneven sections, or posts that were not set securely or to the proper depth. If a gate sags because it was installed incorrectly, the workmanship warranty may require the installer to correct the issue. I recommend asking exactly which installation problems are covered before approving the work.
Labor coverage often lasts only one year, even when the fence materials have a much longer manufacturer warranty. That shorter period reflects the time when installation issues are most likely to appear, such as settling posts, shifting panels, or hardware that loosens with regular use. A material warranty may cover defective components but exclude the labor needed to remove and replace them. Understanding that difference can help you avoid unexpected repair costs.
Before signing, I suggest reviewing the proposal for the warranty term, covered repairs, exclusions, and process for requesting service. The document should clearly state whether the installer will provide labor and materials for a covered workmanship issue. It should also explain maintenance requirements, since neglect, storm damage, misuse, and unauthorized changes are commonly excluded. A written, service-specific guarantee gives you a clearer way to compare providers and make a lower-risk decision.

A fence warranty usually excludes damage from events or conditions outside the installer’s control. Common exclusions include storms, fallen trees, vehicle impact, ground movement, misuse, poor maintenance, and unauthorized changes, such as moving posts or attaching heavy structures. Improper installation may also be excluded from a manufacturer’s product warranty, which is why the installer’s workmanship guarantee matters separately. Before signing, I recommend asking exactly which repairs include labor, materials, removal, and reinstallation.
It also helps to separate product coverage from workmanship coverage. A manufacturer warranty may address defective materials, premature rot, cracking, or other manufacturing problems, while an installer warranty typically covers issues caused by poor placement, weak fastening, or posts that were not set correctly. Even a “lifetime” warranty often applies only to the product, may exclude labor, and can require proper maintenance, approved installation, or a specific claims process. I always suggest requesting a written proposal that identifies the warranty period, exclusions, transfer rules, and service-specific guarantees in plain language.
Written terms are important, but they may not be the only source of protection. Depending on the state and the facts of the project, implied warranty rights may apply even when a written warranty is limited or missing. Keep your proposal, contract, invoices, maintenance records, photographs, and warranty communications in case a problem develops. If a dispute arises, review the warranty alongside your state’s consumer and contract laws, and consider qualified legal guidance before giving up a claim.
Fence warranty coverage usually includes two written protections: the manufacturer’s warranty for defective materials and the installer’s warranty for workmanship. A product warranty may cover issues such as premature rot, cracking, peeling, or manufacturing defects, while a workmanship warranty may address loose posts, poor alignment, or installation problems. These warranties often have different time limits, and workmanship coverage is usually much shorter. I also keep in mind that a “lifetime” warranty typically applies only to the product, not labor or every problem that may occur during ownership. State law may provide additional implied warranty rights, but those protections can vary.
When I compare warranty terms, I look closely at the coverage period, whether labor is included, and whether benefits are prorated over time. I also check the claim process, including who must be contacted, what proof is required, and whether an inspection or photographs are needed. Transfer rules matter if I might sell the property, since some warranties transfer only once or require notice within a set period. Maintenance requirements and exclusions deserve equal attention because neglect, storm damage, soil movement, improper repairs, and unauthorized changes may void coverage.
Before signing, I request a written proposal that clearly separates product protection from the installer’s service-specific guarantee. The proposal should identify the covered materials, workmanship period, labor responsibilities, claim deadlines, transfer rules, and any prorated benefits. I also ask the installer to explain how maintenance affects coverage and who handles a claim if a material defect and installation issue overlap. Reading these terms up front makes it easier to compare bids and reduces surprises if a problem appears later.
When I review fence warranty coverage, I separate protection for the materials from protection for the installation. A manufacturer warranty may cover defective posts, panels, hardware, or premature damage caused by a product issue, while an installer’s workmanship warranty usually addresses problems such as loose posts, uneven sections, or improper attachment. These warranties often have different time limits, exclusions, and claim requirements. State law may also provide implied warranty rights, even when a written warranty is limited, so I do not rely on the word “lifetime” alone.
Before choosing a fence provider, I ask for a written proposal that explains exactly what is covered and for how long. I also check whether labor, removal, repairs, maintenance, weather damage, and normal wear are excluded, and whether the warranty can be transferred if I sell the property. Clear service-specific guarantees tell me who handles a problem and what costs I might still have to pay. Taking a few minutes to review those terms can reduce surprises and help me choose coverage I can understand and rely on.
A fence warranty usually covers defective materials or manufacturing problems, such as premature cracking, rotting, peeling, or broken components. It may not cover normal aging, storm damage, accidents, poor maintenance, or changes made without approval. I always recommend reading the written terms instead of relying on the word “lifetime.”
A material warranty comes from the fence manufacturer and protects against product defects. A workmanship warranty comes from the installer and covers installation problems, such as leaning posts, loose gates, or uneven sections. These warranties have different terms, so make sure you know who handles each type of claim.
Usually, it does not. A manufacturer may replace defective materials while excluding removal, delivery, labor, and reinstallation costs. Before signing a contract, ask who pays those expenses if a covered problem occurs.
Common exclusions include storm damage, flooding, accidents, misuse, poor maintenance, normal wear, pests, and unauthorized repairs or alterations. Some warranties also exclude damage caused by improper cleaning or installation by someone other than an approved contractor. I recommend asking the provider to explain every major exclusion in plain language.
The coverage period depends on the material, manufacturer, and installer. Material warranties may last much longer than workmanship warranties, which often cover installation for only a limited number of years. Check whether the warranty is full or prorated, since prorated coverage may pay less as the fence gets older.
Some warranties transfer to a future homeowner, but others end when the property changes hands or allow only one transfer. A transfer may also require written notice, a fee, or proof that the fence was maintained. Confirm the rules before buying, especially if resale value matters to you.
Many warranties require reasonable maintenance, such as cleaning the fence, controlling plants around it, inspecting posts and gates, and repairing small problems promptly. Keep receipts, photos, and service records when possible. If you skip required maintenance, the provider may deny a claim.
Start by reviewing the warranty and contacting the correct provider, either the manufacturer or the installer. Take clear photos, record when you noticed the problem, and gather your contract, receipts, and maintenance records. Ask in writing what the claim covers, who pays for labor, and how removal, delivery, and reinstallation will be handled.
A new fence can add privacy, security, and curb appeal, but professional installation often costs around $3,270. Many homeowners pay between $1,860 and $4,833. Premium materials, multiple gates, uneven ground, permits, and old-fence removal can raise the price. I’ve found that comparing fence financing options early helps protect your budget without putting the project on hold.
You may be able to pay with savings, use contractor-arranged financing, take out a personal or home-equity loan, or choose a credit card, promotional plan, or installment option. Each choice affects your interest rate, monthly payment, repayment time, and financial risk. The right fit depends on your credit, available cash, project cost, and how quickly you can comfortably repay the balance.
Fence financing options can make a planned installation easier to manage, especially when the project costs more than expected. A professionally installed fence often costs around $3,270, but your total may range from under $2,000 to well over $10,000 depending on the materials, property size, gates, terrain, permits, and old-fence removal. I usually recommend starting with savings if paying in cash still leaves room for emergencies. This approach avoids interest and keeps the project from becoming a long-term bill. If cash would stretch your budget too far, financing can help you move forward with predictable payments.
Contractor-arranged financing may offer a convenient way to spread out payments, but I would review the interest rate, loan term, fees, and promotional expiration date before accepting an offer. An unsecured personal loan can also provide a fixed payment without using your home as collateral, although approval and rates depend on your credit and income. Credit cards or buy now, pay later plans may work for a smaller project or a short promotional period, but deferred interest and high standard rates can make them expensive if you do not pay the balance on time. I always suggest comparing the total repayment amount, not just the monthly payment. A lower payment can still cost more when the loan lasts several years.
Home-equity loans and HELOCs may provide larger amounts or lower rates for qualified homeowners, but they use your home as collateral and require careful consideration. A home-equity loan usually provides a fixed amount and payment, while a HELOC works more like a revolving line of credit and may have a variable rate. In areas where it is available, PACE financing is another option, but it can affect your property tax bill and future home sale. I recommend reviewing the terms closely. Before choosing a plan, match the payment to your monthly budget and confirm that the fence contractor accepts that type of financing. The right choice covers the project without putting your emergency savings or essential expenses at risk.

A professionally installed fence costs about $3,270 on average, while many projects fall between $1,860 and $4,833. I usually start with the estimated linear footage because average pricing is around $23 per linear foot. Then I account for the material you choose. Gates, permits, uneven terrain, old-fence removal, site access, and labor can all raise the final quote. Larger or more complex projects may cost considerably more, so I recommend getting a written estimate before choosing among fence financing options.
If paying in cash would strain your budget, I would compare contractor-arranged home improvement financing, an unsecured personal loan, a home-equity loan, or a HELOC. Credit cards with a promotional period and installment payment plans may also work for smaller projects, but I would check the interest rate, fees, credit requirements, and what happens when the promotional period ends. Home-equity options may offer a lower rate, but they use your home as collateral and can take longer to arrange. The best choice depends on your credit, available equity, project size, and how quickly you want the installation completed.
Before applying, I calculate a comfortable monthly payment by subtracting any down payment from the project total and dividing the balance by the planned number of payments. I then add estimated interest and fees. For example, a $3,270 fence with a $500 down payment leaves $2,770, which would be about $115 per month over 24 months before interest or fees. I also leave room in the budget for maintenance and unexpected site work instead of borrowing the maximum amount. Comparing the total repayment amount, not just the monthly payment, helps me choose financing that keeps the fence affordable over time.
I usually start with cash or savings because paying the fence contractor directly avoids interest, fees, and a credit check. This can make sense for a smaller project, especially when the quote fits comfortably within your budget. However, I recommend keeping your emergency savings intact. Contractor-arranged financing may offer convenient monthly payments, promotional rates, or fixed terms, which can help you begin a larger installation sooner. Before signing, I would confirm the interest rate after any introductory period, the loan term, fees, and whether deferred interest applies. This option often suits homeowners who want a simple application at the time of purchase and have fair to strong credit.
An unsecured personal loan does not use your home or fence as collateral, so the main risk is a higher interest rate than secured borrowing. Lenders usually review your credit score, income, debts, and payment history. Stronger credit may help you qualify for better rates and longer terms. Fixed-rate personal loans provide predictable payments, making them useful for a complete project with a clear quote that includes gates, grading, permits, or removal. Shorter terms can reduce total interest but raise the monthly payment. Longer terms lower the payment but increase the overall cost. I would compare the annual percentage rate, origination fee, monthly payment, and early-payoff rules before accepting an offer.
Home-equity loans and HELOCs can work well when a fence is part of a larger improvement plan or the project cost is substantial. A home-equity loan typically provides one lump sum with a fixed rate and predictable payments. A HELOC lets you draw funds as needed and commonly has a variable rate, so payments can change. Both use your home as collateral. This may allow lower rates, but it creates a serious risk if you cannot repay the balance. These options also involve credit, income, available equity, and sometimes appraisal requirements, along with possible closing costs. I would choose them only after confirming the full repayment cost and making sure the payment remains comfortable if rates rise.

Credit cards can be convenient for a smaller fence project or deposit, especially if you can pay the balance quickly. Promotional financing may offer a low or zero interest period, but check whether interest is deferred and charged retroactively if you do not pay the balance in full by the deadline. I also look for the regular annual percentage rate after the promotion, late fees, minimum payments, and any automatic payment requirements. Before using a card, I compare the total repayment cost with the contractor’s financing offer.
BNPL and installment plans divide the project cost into scheduled payments, which can make a larger fence easier to fit into your budget. Confirm the down payment, payment frequency, late-payment policy, possible service fees, and whether missed payments could affect your credit. Most importantly, ask the fencing contractor whether the plan can be used for the full contract, including gates, removal, permits, and unexpected site work. A lower monthly payment is not always the cheapest option, so compare the total amount you will repay.
PACE financing may be available in some areas for qualifying property improvements, but it is tied to the property and can affect a future sale or refinance. I recommend checking local eligibility rules, the repayment schedule, administrative fees, and how the charge appears on your property tax bill. No matter which option you choose, get the financing terms in writing. Confirm when payments begin, how automatic payments work, and what happens if installation is delayed. Choose the plan that lets you complete the fence without stretching your budget beyond a comfortable monthly payment.
I compare fence financing offers by looking beyond the monthly payment. I start with the APR, total repayment amount, loan fees, and repayment length because a lower payment may cost more over time when spread across several years. I check whether the lender charges application, origination, late, or administrative fees, and ask whether there is a penalty for paying the balance early. I also confirm whether the payment plan requires a hard credit inquiry and how missed payments could affect my credit.
A detailed fence quote gives me the number I need before choosing a financing amount. I ask for materials, linear footage, gates, removal, grading, permits, labor, taxes, and site-related charges to be listed separately. Then I ask whether the contractor requires a deposit, uses a specific financing provider, or limits which payment plans I can use. If I can pay cash for part of the project, I compare the interest savings from borrowing less with the need to keep enough money available for emergencies.
Before accepting an offer, I compare the same project cost and repayment period across contractor financing, a personal loan, a home-equity option, a credit card promotion, and an installment plan. I verify when payments begin, whether promotional rates expire, and what happens if the project changes or runs over budget. Financing can make a needed fence easier to install now, but the best choice has a clear total cost and a payment that fits comfortably within my budget. Getting the terms in writing helps me avoid surprises and move forward with confidence.
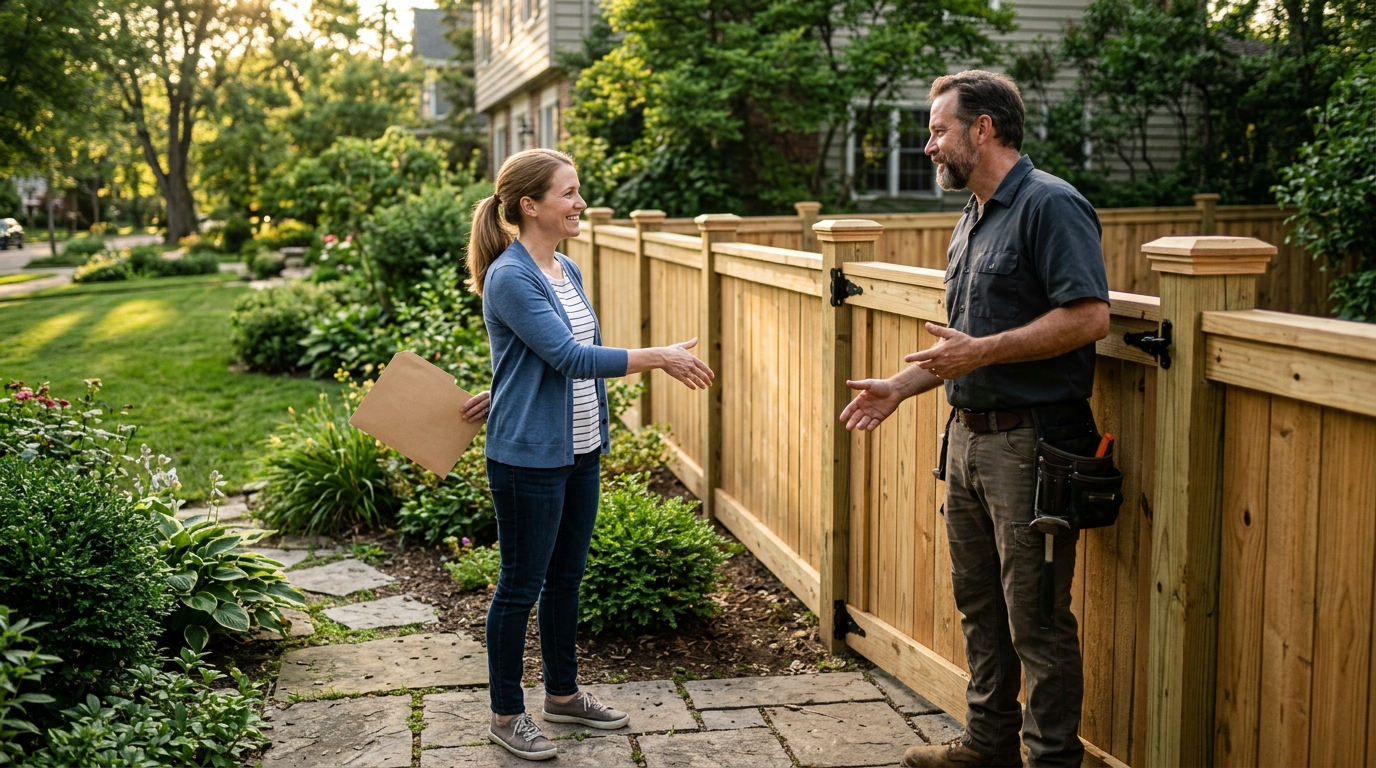
The best fence financing option depends on the project size, the savings you have available, and how comfortable you are with monthly payments. For a smaller fence, paying with cash or using a short promotional plan may help you avoid long-term interest. Larger projects may be easier to manage with contractor-arranged financing, a personal loan, a home-equity loan, or a HELOC, depending on your credit profile and available equity. I would also consider whether the payment fits comfortably within your budget after accounting for interest, fees, and the loan term. A lower monthly payment can cost more overall if it takes much longer to repay.
Before signing an agreement, I recommend comparing the total cost of every option, not just the advertised payment. Ask for the complete fence price, including materials, labor, gates, permits, removal, site preparation, and added charges. Check the annual percentage rate, origination fees, prepayment rules, and what happens when a promotional or deferred-interest period ends. Confirm that the financing amount matches the final written quote, and make sure you understand when payments begin. With those details in hand, you can choose a payment approach that lets you move forward without putting unnecessary pressure on your budget.
Choosing the right fence financing options starts with knowing your total project cost and monthly budget. A professionally installed fence often costs around $3,270, but your quote may be higher or lower depending on the materials, property size, gates, terrain, permits, and old-fence removal. If you have enough savings, paying in cash avoids interest. Contractor-arranged financing, a personal loan, or a home-equity option may spread payments over time. Credit cards, promotional financing, and buy now, pay later plans can also help, but I recommend checking the interest rate, fees, and repayment period carefully.
Before moving forward, I suggest comparing at least two payment options and looking at the total amount you will repay, not just the monthly payment. Ask whether the financing has deferred interest, prepayment penalties, variable rates, or a credit check. Make sure the payment fits comfortably within your budget. Home-equity loans, HELOCs, and PACE financing may offer different terms, but they can involve added risks or requirements, so review them closely. With a clear quote and a financing plan you understand, you can improve your property’s privacy, security, and appearance without taking on more debt than you can manage.
You can pay with savings, use financing arranged by the fence contractor, take out an unsecured personal loan, or borrow against your home’s equity. A credit card, promotional financing plan, or buy now, pay later option may also work for a smaller project. I recommend comparing the interest rate, fees, monthly payment, and repayment period before choosing.
Paying with savings can be the least expensive option because you avoid interest and loan fees. I recommend using cash only if you will still have enough set aside for emergencies and other essential expenses. If paying in full would leave you short, financing part of the project may be safer for your budget.
Contractor-arranged financing can be convenient and may offer fixed monthly payments or a promotional interest rate. Before accepting it, check the annual percentage rate, loan term, origination fees, minimum payments, and what happens when a promotional period ends. I also recommend comparing the offer with a loan from a bank or credit union.
An unsecured personal loan can cover the project without using your home as collateral. These loans often have fixed payments, but your interest rate and approval depend on your credit, income, and debt. I would request quotes from several lenders and compare the total repayment cost, not just the monthly payment.
A credit card or installment plan may be useful for a smaller fence project if you can repay the balance quickly. Be careful with deferred-interest offers, high credit card rates, late fees, and short repayment periods. I only recommend this option when the payment fits comfortably within your budget and you understand the terms.
A home-equity loan or line of credit may offer a lower rate for a larger project, but your home secures the debt. That means missed payments can create a serious financial risk. I would consider this option only after reviewing the fees, rate structure, repayment terms, and your ability to make payments over time.
Start with a detailed estimate that includes materials, labor, gates, permits, uneven-ground work, and old-fence removal. Professionally installed fences often cost around $3,270, but projects can range from about $1,860 to $4,833 or much more for large or premium installations. I recommend borrowing only what you need and leaving room in your budget for unexpected costs.
Compare each option by total cost, interest rate, monthly payment, repayment length, fees, and financial risk. Savings may cost the least, while a fixed-rate personal loan can provide predictable payments without putting your home up as collateral. Choose the option that lets you complete the project without draining your emergency fund or taking on a payment you cannot comfortably afford.
Planning a new fence? The requirements for a fence permit in Los Angeles can vary based on the fence’s height, material, and location. A wood or wrought-iron fence may not need a building permit in the City of Los Angeles, while masonry fences over 3½ feet generally do.
The City of Los Angeles, unincorporated Los Angeles County, and nearby cities follow different requirements. I recommend confirming which agency handles your property, then checking height, setbacks, and special zoning rules. Doing so can help you avoid delays, redesigns, and unexpected costs.
Before planning a fence project in Los Angeles, I first confirm which local government has authority over the property. “Los Angeles” may mean the City of Los Angeles, unincorporated Los Angeles County, or a separate city such as Pasadena, Santa Monica, Burbank, Glendale, or Long Beach. Each jurisdiction may apply different rules for fence height, materials, placement, and required approvals. Checking the property address with the correct building or planning department can prevent delays after you choose a contractor or order materials.
In the City of Los Angeles, a building permit is generally not required for a wood or wrought-iron fence up to 10 feet high. A permit is generally required for other fence types over 10 feet, while masonry or concrete fences over 3½ feet typically require approval. Some mixed masonry and concrete fences up to 6 feet may qualify for an exemption, but only when they meet specific construction conditions. I recommend reviewing the current local requirements instead of relying on a general height rule, especially for commercial properties, unusual designs, or fences near streets and property lines.
For a residential or commercial project, I start by confirming the jurisdiction, measuring the proposed height, and identifying the fence materials before applying. I also check whether zoning, historic-district, corner-lot, visibility, easement, or property-line rules could affect the design. Unincorporated Los Angeles County and incorporated cities use their own approval processes, so requirements can change significantly from one neighborhood to the next. A quick local review gives homeowners and property managers a clearer scope, a more accurate budget, and greater confidence that the finished fence will comply with local rules.
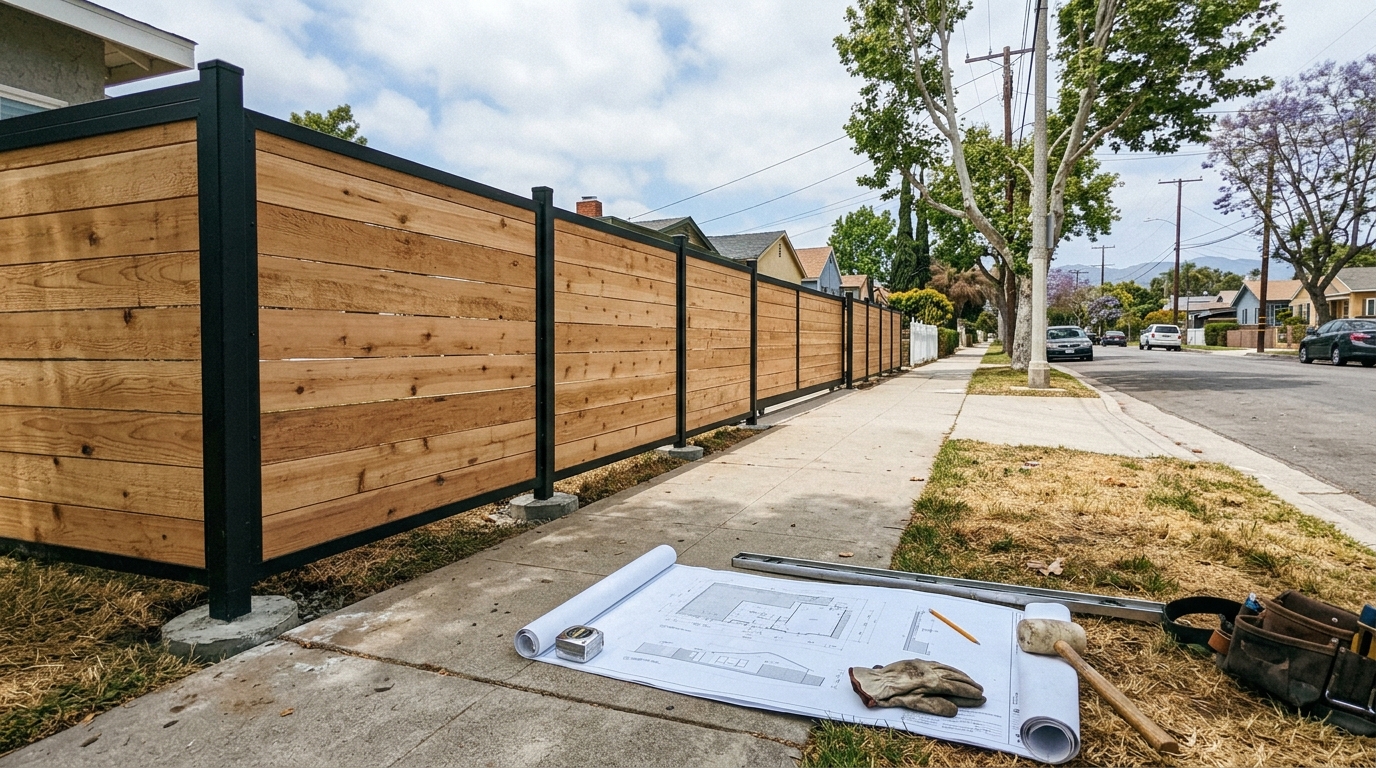
For a fence permit in Los Angeles, I start by confirming whether the property is within the City of Los Angeles and identifying the responsible building department. In the city, a wood or wrought-iron fence up to 10 feet high generally does not need a building permit. Other fence types over 10 feet generally do require one. A masonry or concrete fence over 3½ feet high also requires a building permit, although some mixed masonry or concrete designs up to 6 feet may qualify for an exemption if they meet the required construction conditions.
A permit exemption does not mean the fence can be built anywhere or in any configuration. I still check zoning rules, required setbacks, corner-lot visibility areas, utility or access easements, historic-preservation restrictions, and any limits affecting the public right of way. These issues can apply even when the fence falls below a building-permit threshold. Before scheduling installation, I recommend confirming the height, materials, location, and property lines so the project does not require costly corrections later.
The phrase “Los Angeles” can also refer to unincorporated Los Angeles County or a separate city, such as Santa Monica, Pasadena, Burbank, Glendale, or Long Beach. Those jurisdictions may use different rules and permitting agencies, so City of Los Angeles guidance may not apply to the address you are reviewing. I use the property’s exact jurisdiction as the first compliance check, then verify any additional approvals needed for the planned fence. That simple step helps homeowners and property managers establish a clear scope before hiring a fencing contractor.
A fence permit in Los Angeles depends first on where the property is located. If the address is in unincorporated Los Angeles County, you will generally work with the County rather than the City of Los Angeles. If it is within Santa Monica, Pasadena, Burbank, Glendale, Long Beach, or another incorporated city, that city’s planning and building departments set the approval process. Confirming the jurisdiction before applying can prevent delays, incorrect forms, and work that may need to be changed later.
For a property inside the City of Los Angeles, a building permit is generally not required for wood or wrought-iron fences up to 10 feet high, while masonry or concrete fences over 3½ feet high generally require one. Other fences over 10 feet may also need a permit, and limited exemptions can depend on detailed construction conditions. County and city rules may differ based on fence height, materials, location, zoning, corner visibility, and other site conditions. I recommend checking the official property jurisdiction and contacting the correct agency before relying on City of Los Angeles rules or scheduling installation.
Before hiring a residential or commercial fencing contractor, I would verify the address through the county or city property information system and ask which agency handles permits for that parcel. Keep the fence height, materials, site plan, and any special features available, since the reviewing agency may need those details. It is also smart to check for easements, shared property lines, HOA requirements, and historic-district or design rules. Taking these steps early gives you a clearer scope, a more accurate estimate, and a better chance of completing the fence without compliance surprises.

Start by confirming whether the property is in the City of Los Angeles, unincorporated Los Angeles County, or another incorporated city such as Pasadena or Santa Monica. Each location can have different zoning rules, height limits, setbacks, visibility restrictions, and permitting agencies. I also check the property line, easements, corner-lot sightlines, and any HOA or community rules before finalizing the design. In the City of Los Angeles, a wood or wrought-iron fence up to 10 feet high generally does not need a building permit, while masonry or concrete fences over 3½ feet typically do. These exemptions have conditions, so I never assume a project is automatically approved without checking the current local requirements.
Next, I document the fence height, length, post spacing, foundation details, gates, and materials so the building department can review a clear scope of work. If the project needs approval, I contact the correct building or county office and ask whether drawings, structural details, or site plans are required. Plans may be needed for taller fences, masonry construction, unusual designs, or work affected by zoning and site restrictions. I keep the approved permit and plans available on site, and I confirm whether inspections are required before installation is covered or concealed.
Property managers should review the permit plan with the fencing contractor before work begins and confirm who will submit the application, pay the fees, schedule inspections, and close out the permit. I also recommend confirming the exact fence location, material, finished height, access needs, insurance, and responsibility for protecting nearby landscaping or utilities. A reliable contractor should explain approval concerns before ordering materials rather than treating the permit question as an afterthought. Getting these details in writing helps prevent delays, change orders, and disputes with owners, tenants, or neighboring properties.
A fence permit in Los Angeles depends first on where the property is located. The City of Los Angeles, unincorporated Los Angeles County, and nearby cities each follow different rules and use different permitting agencies. In the City of Los Angeles, a wood or wrought-iron fence up to 10 feet high generally does not need a building permit, while masonry or concrete fencing over 3½ feet usually does. These exemptions have conditions, so I confirm the jurisdiction, materials, height, and design before work begins.
Height is only one part of the compliance review. I also look for fences that block visibility near a driveway, corner, or sidewalk, extend across an easement, or sit in the public right of way. Historic-district properties may have additional design restrictions, and a fence that appears acceptable in one neighborhood may still require approval in another. These issues can lead to correction notices, project delays, fines, or even a removal order.
A site review gives homeowners and property managers a practical way to catch problems before hiring a fencing crew or starting construction. I check property lines, access areas, easements, nearby sidewalks, and the proposed fence layout against the applicable local requirements. When needed, I help identify whether a building permit, zoning approval, historic review, or separate agency clearance may be required. That early review can make the approval process smoother and reduce costly changes after installation.
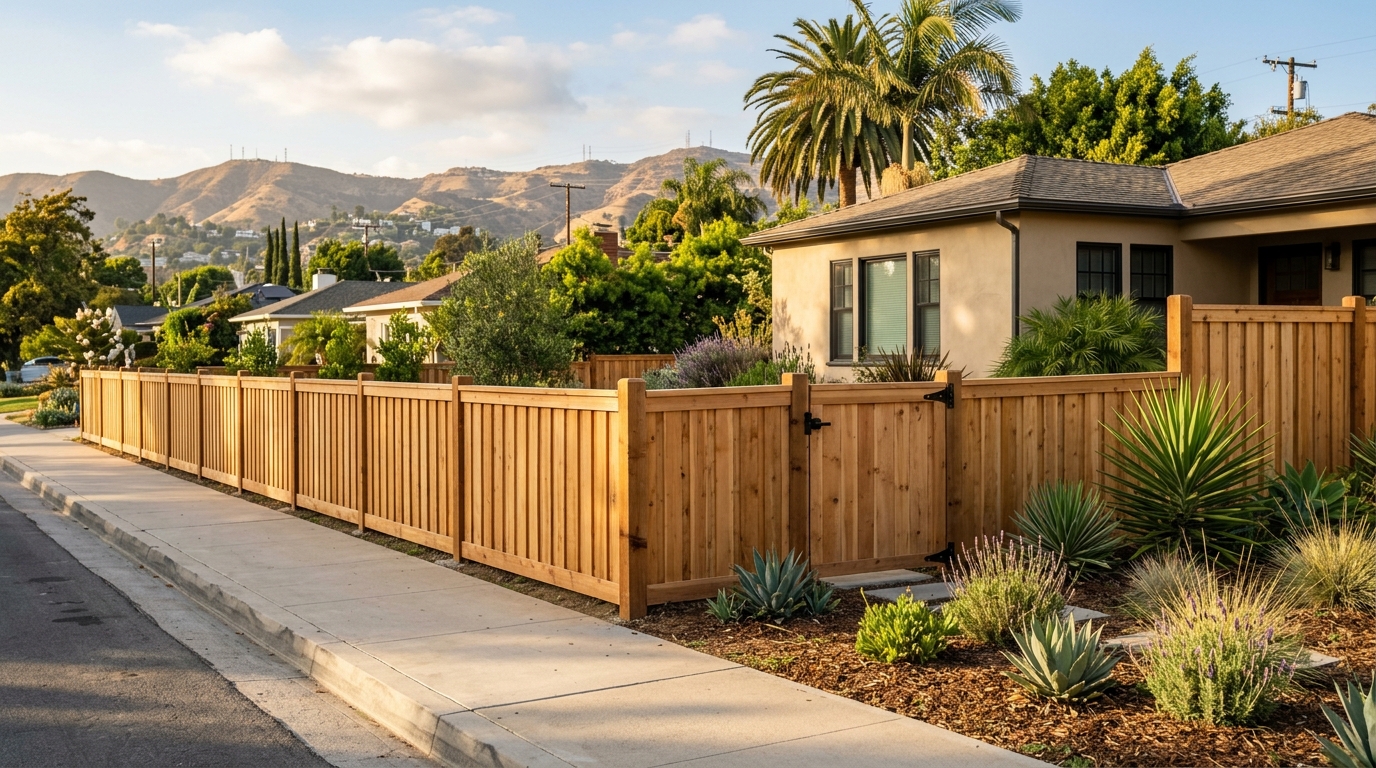
For a fence permit in Los Angeles, the requirements often depend on the material and height. In the City of Los Angeles, a wood or wrought-iron fence up to 10 feet high generally does not need a building permit. A permit is generally required for other fence types over 10 feet high, while masonry or concrete fences over 3½ feet high usually require one. Some mixed masonry and concrete designs up to 6 feet may qualify for an exemption, but only when they meet specific construction conditions.
The address matters just as much as the fence design. The City of Los Angeles, unincorporated Los Angeles County, and incorporated cities such as Pasadena, Santa Monica, Burbank, Glendale, and Long Beach follow different rules and use different permitting agencies. Before scheduling installation, I recommend confirming the property’s jurisdiction and checking requirements for height, materials, location, corner visibility, and any zoning or neighborhood restrictions. A permit exemption does not automatically mean the planned fence meets every applicable rule.
Taking these steps before hiring a contractor can help prevent redesigns, inspection issues, and unexpected costs. Ask the proper building or planning agency whether your project needs a permit, and keep written guidance when possible. I also recommend choosing a fencing contractor who can review the design, identify approval concerns, and support a compliant installation for either a residential property or a commercial site. With the right verification upfront, you can move forward with a fence that fits your property and local requirements.
For a fence permit Los Angeles project, I start by confirming which agency has jurisdiction. The City of Los Angeles and unincorporated Los Angeles County follow different rules, while cities such as Pasadena, Santa Monica, Burbank, Glendale, and Long Beach set their own requirements. In the City of Los Angeles, a wood or wrought-iron fence up to 10 feet high generally does not need a building permit, but a masonry or concrete fence over 3½ feet high usually does. Other fence types over 10 feet high may also require a permit, and some mixed masonry designs qualify for an exemption only when they meet specific construction conditions.
Before I schedule installation, I recommend checking fence height, materials, placement, and any special zoning or site conditions with the correct building department. This step is especially important for property managers, corner lots, commercial properties, and projects that combine fencing with gates, walls, or security features. Confirming the rules early helps prevent redesigns, inspection issues, and unexpected costs. With the permit requirements clear, I can move forward with a compliant fence plan that fits the property and keeps the project on track.
It depends on the property’s jurisdiction, fence height, materials, and location. In the City of Los Angeles, wood or wrought-iron fences up to 10 feet high generally do not need a building permit, while masonry or concrete fences over 3½ feet typically require approval. I recommend confirming the current rules with the agency that serves your property before starting work.
No. The City of Los Angeles, unincorporated Los Angeles County, and cities such as Pasadena, Santa Monica, Burbank, Glendale, and Long Beach can have different requirements. I first verify the property address and contact the correct building or planning department before choosing a design or ordering materials.
In the City of Los Angeles, wood and wrought-iron fences up to 10 feet high generally do not require a building permit. Other fence types over 10 feet generally require one, and masonry or concrete fences over 3½ feet typically need approval. Height limits and exemptions can depend on construction details, so I always check the current requirements for the specific project.
Masonry and concrete fences over 3½ feet generally require approval in the City of Los Angeles. Some mixed masonry and concrete fences up to 6 feet may qualify for an exemption, but only if they meet detailed construction conditions. I do not rely on the exemption without confirming that the design meets every applicable requirement.
I start by confirming the governing jurisdiction, measuring the proposed fence height, and identifying all materials. I also check setbacks, property lines, street-facing locations, zoning rules, and any special requirements for commercial properties or unusual designs. These steps can prevent redesigns, delays, and unexpected costs.
You apply through the building or planning agency responsible for the property, which may be a city or county department. The correct agency depends on the property address, not simply the mailing address or the word Los Angeles in the location. I verify the jurisdiction first, then ask about permit requirements, plans, fees, and inspections.
You may face delays, correction notices, added costs, or a requirement to redesign or remove work that does not meet local rules. Problems can also arise when selling the property or when a neighbor reports the project. Checking the requirements before construction is usually faster and less expensive than fixing an unapproved fence later.
You might be wondering what the best method is to improve your outdoor spaces. Your garden may not be laid out uniformly. It may be a minor angled slope, uneven, or both. So you look for ways to make use of your space without compromising its overall appearance.
Worry no more; we are here to help you address that problem by installing a fence on uneven ground. Fencing is without a doubt one of the best methods to improve your outdoor spaces. It is a highly efficient security measure that will immediately prevent any would-be intruders in addition to enhancing the tidy, well-kept aesthetic appeal of your property.
So, just how do you put a fence on a slope?
Use wooden pegs to indicate the ends of your fence line, and then join the ends with the previously used mason line. Your proposed posts' spacing should be measured and marked on the string with tape. The length will typically be between 5 and 8 feet, however, purchasing a prefabricated fence panel may change this.
Each section of your string above the area where the posts will go should have a plumb bob attached. Use a utility flag or some spray paint to mark the location on the ground directly above the plumb bob.
Measure a hole that is at least a third of the height of your post's depth and three times its diameter. Use a post-hole digger to gently remove the dirt by driving it into the ground. Slowly progress until you achieve the proper depth and width. Dig each post hole along the length of your string before moving on. Place the first post in the hole and ensure it is plumb. Your post should be completely vertical, as determined by a specified level.
To promote groundwater drainage, add 3 inches of soil and gravel to the posthole's base. Fill the gaps with your prepared concrete, stopping just short of the hole's bottom. Allow the concrete to set, and if you need to leave the post in place overnight, brace it with bricks.
The Mason line should be fastened to the tops of two fence posts. To ensure that each rail matches the hill's slope, you must use this angle. The normal height of rails from the ground and the tops of your posts are both 8 inches.
Use two 3-inch masonry screws to secure both rails to the posts, matching the slope of the mason line. If you need to butt the second rail up against a post that is sandwiched between two rails, only attach the rail to half of the post's face.
Mark the location of the first rail at a distance of at least 2 inches from the ground. Water can pass through the 2-inch opening in your fence. Check that the first picket is plumb by holding it flush against the post. You can also use the top of the top rail to determine the distance between the masonry line and the top of your pickets.
Using pneumatic brad nails and brad nails, fasten the first picket to the rails. The top of each picket should always be the same distance from the masonry line or the top of the rail as you descend the hill. You can retain the same even slope that the rail has formed by doing this.
Place two tall stakes between the top and bottom of one side of your fence to serve as a reference point while measuring your stepped fence. This time, level it by placing a mason line between the tops of the two stakes. To determine how steep the slope is in that area of the hill, measure the distance from the string's bottom to the ground.
Use the same steps we did above to install and mark your posts. Make sure your posts are level and anchored in the ground using concrete footings that drain adequately. Give the concrete time to set before checking to make sure it stays level.
Divide the overall drop of your fence by the number of sections to get the drop for each section after figuring out the number of posts and fencing sections. Six fence pieces, for instance, will each drop four inches if the drop is 24 inches.
Reuse the Mason line and tie it to the first post using your drop measurement as a guide. This will be 4 inches below the top in our case. Make sure the line is level and string it to your following post. Place a marker where the line meets this post.
The new top of the second post is the line you just added. Trim the post's top where you left your mark. Between your second and third posts, repeat the process. String the line to the third post by measuring down 4 inches from the top of the second post. Cut and keep going.
Mark the area between the two posts where the top rail will go with your mason line one more time. This typically sits between 7 and 8 inches from the top, though your design may dictate a different distance.
Using 3-inch masonry screws, fasten the level rail between the two posts. Use brad nails to fasten your pickets between the two posts. Keep in mind that the tops and bottoms will perfectly line up as they sit side by side.
We assist you in locating experienced fence and gate installers in Los Angeles who can complete both residential and commercial jobs. Being economical, producing high-quality work, and being consistently dependable are our guiding values.
We are the Best Fence Installations in Los Angeles. Get a FREE estimate now!
All types of fences have their own pros and cons but there will always be one that would be best for you. This article aims to differentiate wood fencing and vinyl fencing to help you choose what better fits your fence styles.
Here are some factors to consider when choosing the right type of fencing:
Fences have a variety of uses, and knowing the purpose for which they are going to be used would help in narrowing down your options. Primary objectives for your project include the level of privacy and security, its containment capabilities, aesthetics, boundary marking, and in considering the safety of your pool, children, and fur friends.
Some people typically overlook this aspect when buying a fence for their home. It’s important to keep in mind that vinyl fencing doesn’t require any maintenance other than keeping them clean.
On the other hand, wood fences will require constant maintenance of upkeep, staining, and replacement of lumber in order for your fences to remain to look their best quality. This would add about $1,200 to the wood fence cost in just the first year in comparison to vinyl fencing.
The better option in this aspect: Vinyl fencing
A wood fence has the natural and warm beauty of the earth and you could paint them in any color or any theme you like. It is definitely a beautiful fence material and any imperfections in the lumber are seen as part of its unique beauty.
In contrast, as previously mentioned, vinyl fencing is maintenance-free and does not need to be stained or painted. It doesn't also attract termites, warp, or cause splinters. However, it might be too plain or simple for some people and most paint won’t attach to it well.
The better option in this aspect: Wood fencing
If you are only living in a place temporarily and would only last 1-3 years, a more affordable natural wooden fence would be the best choice for you. Expenses for a wooden fence usually increase in its 3rd year due to maintenance costs, but it is still a great investment up until its 5th year.
Conversely, if you are going to live in your home for the long term, then vinyl or aluminum fencing would be the best option for you. Generally, they are more expensive than a wooden fence but it would last 5-10 years in great condition and is even maintenance free.
Short term: Wooden fencing
Long-term: Vinyl fencing
The cost would depend on the length of time you would want to make your fencing last. Typical short-term investments of 1-5 years are less expensive but get expensive with maintenance over time. With long-term investments of 10-20 years, they can be expensive but have greater value over time and higher return on investment.
Wood fencing possesses the beauty of the wood grain and is commonly less expensive to install than vinyl fencing. However, a wooden fence has the tendency to warp, twist, and crack which is the reason it needs constant maintenance which causes it to lose its return on investment in just 5 years.
Other types of wood include pressure-treated wood, this type of wood goes through the process of having a pressurized solution of water and preservative agents deep into its lumber that would help it to extend its useful lifespan but this comes with additional costs.
Comparatively, a high-quality vinyl fence would last much longer than a wooden fence while requiring no maintenance at all, is untouchable by insects, and definitely cheaper than wood in the long run. In about 10 years, it would be cheaper than wood and would have a higher rate of return on investment which is 6 ½ times over wood.
Los Angeles Fence Builders have years of experience building all types of fences and gates in the area. We are known for our service and reliability for we are strict with our deadlines. We offer the best customer experience, the best fence quality, and the most affordable fence prices. We make the fence installation process easy so that you can quickly get the fences you desire.
Los Angeles is a city that boasts great weather, and what better way to enjoy the sunshine than to relax on your very own deck? Building a deck can significantly increase the value of your property while providing a relaxing outdoor space to entertain family and friends. However, the cost of deck installation can be a deterrent for many homeowners. In this article, we will explore the different ways to install an affordable deck in Los Angeles.
The first step in installing an affordable deck is to research and plan your project. This involves determining the best wood deck design for your space, choosing the right materials, and ensuring your deck meets local regulations. By doing so, you can avoid costly mistakes down the line.
When researching deck designs, consider the size and shape of your yard, your desired level of privacy, and your budget. You can find inspiration for deck designs online or consult with a professional deck builder. Additionally, make sure to check local zoning laws to ensure your deck meets any height or setback requirements.
Choosing the right decking material is crucial to keeping your deck affordable while also ensuring its longevity. Consider the cost per square foot. The most common materials used for deck installation include pressure-treated wood, composite decking, and PVC decking. Pressure-treated wood is the most affordable option, costing around $2-3 per square foot, but it does require yearly maintenance.
Composite decking is more expensive, with a cost to build at around $5-7 per square foot, but it requires little maintenance and has a longer lifespan. PVC decking is the most expensive, costing around $8-10 per square foot, but it is the most durable and requires no maintenance.
When choosing your existing deck material, consider your average cost, the durability of the material, and the level of maintenance required.
DIY deck installation is an excellent option for those looking to save money on their home improvement project. However, it is important to note that DIY deck installation can be a time-consuming and challenging process. Before embarking on a DIY deck project, make sure to do your research and familiarize yourself with the necessary steps, tools, and materials.
Some of the pros of DIY deck installation include saving money on labor costs and having complete control over the design and build process. However, some cons include the potential for costly mistakes, the time commitment required, and the need for specialized tools and equipment.
If you decide to embark on a DIY deck installation, make sure to follow all safety precautions, use high-quality materials, and consult with a professional if you have any questions or concerns.
A professional deck builder can also offer valuable insights on how to make the most of your available space, incorporate existing features like trees or water features into your design, and suggest creative ways to personalize your deck. They can also provide recommendations on which materials to use based on your needs, preferences, and budget.
Another advantage of hiring a deck installation professional is that they have the necessary tools and equipment to complete the job efficiently and safely. This can save you time and reduce the risk of accidents or damage to your property. They can also take care of obtaining any necessary permits and approvals from your local authorities, which can be a complex and time-consuming process.
When selecting a deck builder, it's important to get a detailed estimate of the cost of the project, including materials, labor, and any additional fees or expenses. Comparing multiple quotes can help you find a deck builder that offers competitive pricing while still delivering high-quality work.
Another way to save money is to plan your deck installation during the off-season, as some contractors may offer discounted rates during slower months. Additionally, purchasing materials in bulk or shopping around for the best prices can also help you save money on your deck installation.
If you're planning on financing your deck installation, it's important to evaluate your options and choose a financing plan that fits your budget and financial goals. Personal loans and credit cards can offer quick access to funds, but may come with higher interest rates and shorter repayment terms. Home improvement loans, on the other hand, may have lower interest rates and longer repayment terms, but require collateral and may take longer to obtain.
Before deciding on a financing option, make sure to do your research and compare offers from multiple lenders. Look for lenders that specialize in home improvement loans or personal loans, and consider factors like interest rates, fees, and repayment terms. Additionally, make sure to read the fine print and understand the terms and conditions of the loan, including any penalties for early repayment or late payments.
Once your deck is installed, it is important to maintain it to ensure its longevity and avoid costly repairs. This includes regular cleaning, staining or painting, and replacing any damaged deck boards.
Common deck maintenance mistakes include neglecting to clean your deck regularly, using harsh cleaning chemicals, and not replacing damaged deck boards promptly. By avoiding these mistakes and following best practices for deck maintenance, you can extend the life of your deck and save money on costly repairs.
To clean your deck, sweep away debris regularly and use a mild cleaning solution and a soft-bristled brush to remove any stains or dirt buildup. Avoid using harsh chemicals or pressure washing, as this can damage the surface of your deck. Depending on the material of your deck, you may also need to stain or paint it every few years to protect it from the elements.
If you notice any damaged deck boards or hardware, replace them promptly to prevent further damage to your deck. Regular inspections and maintenance can prevent small issues from turning into larger, more costly problems.
Installing an affordable deck in Los Angeles is possible with the right planning, materials, and maintenance. By researching and planning your project, choosing the right materials, and considering DIY options or hiring a professional deck builder, you can create a beautiful outdoor space that adds value to your home. Additionally, financing options and smart maintenance practices can help you save money in the long run.
If you're looking for an affordable deck installation in Los Angeles, consider reaching out to Los Angeles Fence Builders. Our team of experienced professionals can help you design and install a deck that meets your needs and budget. Contact us today to learn more about our services and how we can help you create the outdoor space of your dreams.
Dogs are considered to be a part of the family for almost every dog owner that’s why they care for their health and safety. What better way to take care of them than a fence for your dogs to keep them in the comfort of your home? Choosing the right fencing material can be hard given the different styles of fence such as vinyl fencing, picket fence, chain link fencing, and aluminum dog fence.
Given the different fencing options, there is a type of fencing that stands out which makes us go back to the question, “Why aluminum fencing is a great option for dog owners?”. Aluminum fences for pets are sturdy and can go against bad weather. In comparison to a wood fence, they are equipped to resist strong winds.
Iron fences will also hinder your pets from digging under the bottom of the fence installed in the backyard with the help of your trusty fencing contractor. It can withstand the sharp teeth of your dogs whenever your fur friends feel like playing around. Finally, it is most preferred by residential homes but an aluminum commercial fence will surely add better security for your home.
Aluminum fences can be set up as high as six feet whereas even a large dog such as a Great Dane will have a hard time going over a durable fence panel for they can only jump as high as 5 feet. But what about small dogs you ask? Here are more reasons why aluminum fencing is a great option for dog owners.
Every small dog owner knows that it’s harder to keep smaller dogs at home because they can easily squeeze their bodies through the gate or the garden. This is the job for the aluminum fence which includes a puppy panel which is also sometimes called puppy pickets, short pickets, or puppy pickets.
They are discretionary and can easily be affixed to your gates keeping your own small dogs in and neighbor small dogs out. However, these puppy panels can not be integrated with your existing fence for their design concept is very different.
A wood fence warps because of changes in moisture content and we all know that a warped fence is unusable. It is when a wooden fence dries faster than any of its other parts. The process is called equilibrium moisture content (EMC), fence boards warping occurs when high/low moisture is exposed to the board which causes it to shrink/expand until it reaches humidity with the air, thus causing boards warp.
It's good to know that there are types of wood that are resistant to warping, especially woods with a straight grain pattern like redwood, which consists of a natural chemical that helps prevent warping. A pressure-treated wood also preserves its life. There are multiple ways to prevent fence board warping, an example of which is wooden boards should be stacked according to their thickness.
Staining is a popular solution to maintain and keep a fence protected from weathering and looking its best. Not only does stain allow for color matching a home, but it also allows the natural wood grain to show through. Yet, many homeowners wonder, “How much fence stain do I need”?
After all, a good-quality stain can be costly and extra trips to the hardware store are often frustrating. An essential step in a staining project is accurately estimating how much stain is needed.
Multiplying the length and height of the fence should be the first calculation before buying stain. This equation will provide the surface area of the fence in square feet.
But, if staining both sides of the fence, a homeowner must double the square feet for an accurate number. Square feet are an important indicator of the amount of stain required. Many stain brands will list coverage in square feet right on the can.
Determining how many gallons of stain for a fence is essential for achieving a uniform and lasting finish. Typically, one gallon of stain covers approximately 150-300 square feet, depending on the wood type and porosity. To calculate how many gallons of stain for a fence, measure the total square footage of your fence by multiplying its height and length.
Divide this number by the coverage rate of the stain you're using. Always buy a bit more than estimated to ensure complete coverage, especially if your fence has an intricate design or rough texture.
Remember that not all stain applies equally, and the coverage area will vary between brands. One can of stain often covers around 150 square feet, but some offer up to 200 square feet per gallon. Take the stain coverage and divide it by the total square feet of fence to determine how much is necessary.
Another factor that could increase the amount of stain required is how weathered the wood appears. For example, if a homeowner has neglected a fence for a few years, the dry wood will soak up more stains.
Brand-new pickets from the hardware store can still hold a bit of moisture and need to dry out before applying a stain. While many agree it’s essential to allow the wood in new fences to dry out a bit, going too long before staining can cause cracking. If the fence appears dry, consider purchasing an extra stain for full coverage.
The above equation works excellently if the fence in question is a typical design with dog ear pickets placed adjacently. However, several other designs of wood fences, such as shadowbox, need a change in the numbers. Shadowbox is a wood fence design with overlapped construction and alternating spaces.
One method to calculate for shadowbox is to multiply the square footage by one and a half instead of two. Return the extra to the hardware store if left with unopened gallons of stain following the project.
One bit of preparation may help the stain last longer. To ensure the fence is ready for staining, consider a premium cleaner that will remove dirt, pollen, and mildew. Wood cleaning products designed for pressure washers work great for removing material that could hinder stain performance.
Once the fence is thoroughly cleaned and dried, it’s time to equip the brush rollers and get to work. A freshly stained fence looks great and helps protect a homeowner's investment.
Contact us at Los Angeles Fence Builders for expert advice on how many gallons of stain you need for a fence. We offer top-quality stains and professional guidance to ensure your fence looks its best. Let us help you achieve a beautiful, long-lasting finish for your fence. Reach out to our team today!
Robert Frost once coined the famous saying, "Good fences make good neighbours," and many homeowners would agree. However, some of the most heated exchanges between those living adjacent to one another occur because of fence disputes. Therefore, new homeowners or those just getting started with a big backyard project might wonder, "which fence is mine?"
There are a few ideas floating around that can mislead people about who owns the fence. One of these misconceptions is that depending upon which side of the fence you see determines ownership. On the contrary, no matter what side the picket's face, it doesn't answer the question. Whether the good side (pickets) of a garden fence faces you or the bad side (framing or rails) of a wooden fence, the fence may not be yours.
Another common fence ownership misconception is that the left side fence when facing the home is the homeowner's property. This theory doesn't account for the myriad of property shapes with irregular dimensions and is absolutely false.
One of the easiest methods of determining who owns a particular fence is to examine a property line survey. When someone purchases a new home, aside from getting the title deeds or land registry, a fencing process is included for a surveyor to measure out and mark the property line.
Typically, large metal stakes are driven into the ground at the plot's edges and mark the exact point a property ends. If you're wondering, whose fence is it and you notice one is built on the land that belongs to you; whether it's a residential or commercial fence, legally it belongs to you.
If you didn't have a survey done previously or can't find an existing survey, it's always a good idea to hire a surveyor. Using high-tech equipment, surveyors can help resolve property disputes and give homeowners peace of mind.
A property line map is among the many forms, documents, and file folders homeowners receive after successfully purchasing a house. This map is handy and scales with visual cues like landmarks. Oftentimes, property line maps also indicate where your neighbour's property boundary is in relationship to your own.
If you find yourself in a debate with your neighbour over the ownership of a fence, you can consult the property line map and share your findings next door to prevent further conflict.
If for some reason, the property line map is missing from your home's paperwork, there are other ways to get one. First, you can contact your county and speak with your local assessor. The assessor may be able to provide you with a copy of the property line map either electronically or in person.
What if you don't have the means to hire a surveyor and can't get ahold of a property line map? You're in luck because smartphone applications like LandGlide can help you define your property line. Now, remember that even though a smartphone can use GPS to help find your property line, it's not exact.
A professional surveyor has vastly more accurate tools that stand up to legal challenges. However, for a general idea of where your property line extends, you can approximate it with smartphone apps.
Determining fence ownership can be challenging but is essential for maintaining property boundaries and resolving disputes. The primary method for determining which fence belongs to whom involves conducting a property line survey, which provides definitive legal evidence of boundary lines.
In cases where surveys are not readily available, consulting county assessors' property line maps or using land mapping apps like LandGlide can offer a general idea of ownership. This information is crucial for homeowners looking to establish or confirm the limits of their property rights.
Need to identify fence ownership? Let us help you determine whose fence it is with accuracy. Contact LA Fence Builders for expert advice and professional service.
If you are contemplating building a new picket fence for your Los Angeles home, you probably wonder if this fence will add value to your property. Unfortunately, there is no guaranteed return on investment with fencing. However, a well-constructed and visually appealing design certainly adds positive factors to your selling points and curb appeal. Of course, a poorly constructed fence can take away from these benefits. This is why it is so important to work with reputable contractors like Los Angeles Fence Builders.

Quality picket fencing contractors know that a fence is more than just a boundary to frame your property. In fact, a white picket fence provides visual appeal, accents your home’s architecture and provides safety and security. Whether or not the fence increases your Los Angeles home’s value comes down to the materials you use, construction quality and how well you maintain the fence.
Building a quality wood picket fence – or fencing of any kind, for that matter – is not cheap. Most Los Angeles home fence projects fall in the range of $1,700 to $4,000. But this cost can vary widely based on multiple factors. These factors include:
Materials for a white picket fence in Los Angeles typically range from $1 to $45 per linear foot. Fences enclosing the front yard are usually 3 feet high. Backyard fences are typically taller for privacy, security and safety. If you want your picket fencing to enhance the value of your home and provide a good return on your investment, it is important to use good materials and keep it well maintained.
For generations, the white picket fence has been a defining factor in the American Dream. From the middle of the 19th century forward, this type of fence has made a visual statement of homeowners having “arrived” in their social and economic status as part of the middle class.
For many people, this symbol holds strong, today. But modern picket fencing is much easier to maintain than in the past. If you choose the right materials, you will not repeatedly find yourself having to sand and paint the wood slats under the hot Los Angeles sun, like a 21st century Huckleberry Finn. In fact, some materials require no painting at all to achieve the white picket fence dream.
Vinyl fencing requires little to no maintenance, whatsoever. In fact, it only requires an occasional rinsing with the garden hose to remove any dirt or debris and keep it looking as fresh as the day it was built. The vinyl is actually a plastic material covering wood slats and making them weatherproof.
Of course, traditional wood picket fences are still timeless options for traditional appeal. You must be ready to invest some time or money in maintaining wooden slats, however. This maintenance includes occasional sanding and repainting as the finish appears worn. Other options are the less common wrought iron and aluminum.
If you are ready to add a fence to your Los Angeles home, call the pros of Los Angeles Fence Builders. We will help you choose the right materials and type of fence to get the best return on your investment. We also provide free quotes and easy scheduling to help you quickly achieve your white picket fence dream. Contact Los Angeles Fence Builders at (424) 625-8561 today.
One of the latest and hugely popular privacy options for your residential or commercial property is horizontal fencing. In fact, many people are calling these styles the white picket fence of the modern age, due to property owners’ recent high demand. But unlike their white picket counterparts or even the old standard of vertical wooden fences, these horizontally slatted designs offer much more durability, privacy and style for your exterior décor. Below, we examine these major benefits of horizontal fences so you can decide which type suits you best.
Property owners have fallen in love with horizontal fencing because this construction style offers so many options for customization. In fact, the styling complements any type of building construction, from rustic to contemporary and ultra-stylish. Through your choice of materials and structure, you can add your personality to outdoor areas, whether those areas are for private or public use.
One of the greatest benefits of horizontal fencing is its durability. This long-lasting sturdiness is particularly evident when compared to a traditional wood privacy fence. Although many factors like the age of the fence construction, materials used and installation quality all play a role in a privacy fence’s lifespan, a fence with parallel slats simply has more staying power. This durability starts with the horizontal fence’s frame, one typical built using metal posts and beams. There is quite simply no way natural wood or vinyl products can outlast time-tested steel.
Even today’s pressure-treated wood products deteriorate, a natural decomposition and erosion that steel does not experience. Wood cannot stand up more than a few decades against wood rot, insect infestation and other damage. In fact, the wood at the ground level and buried by earth is the most vulnerable to this erosion. Metal posts of horizontal fencing are unaffected by the elements that take vertical wood fences down.
Horizontal fencing offers greater privacy options than vertical fencing, too. One option for this super modern fence is to use tongue-and-groove pickets. This type of fence picket locks together and leaves no gaps between slats. Of course this means the slats form a solid wall with zero visibility from one side to the other. With privacy comes greater safety for your whole family, residents of the property or commercial guests.
With the privacy and durability benefits of horizontal fencing also come fantastic visual appeal that raises your property value. Besides adding beauty, the horizontal slats actually make your property look bigger. The fence structure is simple yet beautiful, consisting of a metal framework and slats between the frames to suit your design aesthetic. But this structure offers almost unlimited design possibilities.
For your horizontal fencing, you can choose from infill made of a wide range of materials. The most common materials include natural wood, stained wood, metal, vinyl and composite planks. Instead of just building a fence around your home or commercial property, your horizontal fence is an architectural feature. All of these design options are mounted to the structure that is secured to a concrete slab or directly in the ground.
Knowing whether horizontal fencing is right for you and your property comes down to exploration of your options, materials and the best fence contractors for the job. To meet all of these needs and ensure your ideal fence installation, contact the professionals of Los Angeles Fence Builders. We are the #1 most trusted fence builders in L.A. and offer years of experience in building all types of fencing throughout this region. Call us today at (424) 625-8561 for more information and a free estimate.
If there is one thing that most residents of the Los Angeles area want from their home, it is privacy. A privacy fence is one of the best ways to enhance your property and enjoy it fully without feeling like you are on full view by your neighbors. But the biggest hurdle to overcome in deciding to build one of these fences is cost. So, how much does a privacy fence cost in L.A.?
Generally speaking, homeowners can expect to pay an average of $1750 to $6975 for a privacy fence. This amount includes labor and materials. The average privacy fence cost in the United States is $4375 with most installers charging by the linear foot. Wherever you live, you can expect to pay between $15 and $40 per linear foot at a minimum and according to your individual project plans. In Los Angeles where privacy is at a premium, average costs range from $30 to $120 per linear foot. Let’s look at this privacy fence cost more deeply, below.
Obviously, the benefits of having a privacy fence are many. You can enjoy your backyard without feeling watched. You can also reduce noise levels and create a haven of your own on your property. Having a privacy fence provides security and keeps children and pets safe.
Luckily, you are one of the biggest factors in how much your privacy fence costs. Much of the final amount depends on which materials you choose, how large your property is and other such factors. The national average for privacy fence cost is about $4375 as explored above. At the far low end of the cost spectrum is a $1400 average for small yards and low cost materials. At the higher end of the national average is $8250 for an elite privacy fence.
Of course, Los Angeles is a place of extremes in all aspects of real estate and design. So you can certainly choose from a variety of features and materials that affect your budget, one way or the other. Your best bet is to work with an experienced fencing contractor who can help you design the fence that best suits your needs. A price quote is the best way to find out your specific privacy fence cost.
Most fencing installers quote the project price based on how many linear feet the yard requires. In fact, size is the biggest factor in your privacy fence cost. Other factors include:
As said before, you can expect a privacy fence cost range of about $30 to $120 per linear foot in Los Angeles. Using this scale, you can develop an estimate of how much your fencing project will add up to according to the number of feet required to enclose your yard.
Besides linear feet and where you live, there are many other factors in how much a privacy fence costs. These include the three listed above. Which materials you choose, the fence height and other details of the design are big influencers in final pricing. It is important to consider these factors when developing your project budget.
Some specific privacy fence cost factors to include beyond geographic location and linear feet include:
Whether you want a budget-friendly privacy fence for your Los Angeles area backyard or one with more expensive materials and features, Los Angeles Fence Builders has the experience to provide the results you seek. We service all of Los Angeles, San Bernardino Valley, San Gabriel Valley and San Fernando Valley. Call us today at (424) 625-8561 for a consultation and to learn your own specific privacy fence cost.
What is the most affordable privacy fence material in Los Angeles?
Vinyl fencing is currently one of the most cost-effective and low-maintenance options available in Los Angeles, offering durability and longevity . While wood fences may have a lower initial cost, they often require more maintenance over time.
How long does it typically take to install a privacy fence?
Professional installation of a privacy fence generally takes between 20 to 30 hours, depending on the size and complexity of the project . DIY installations can take longer, especially if additional tasks like obtaining permits or leveling the ground are needed.
Do I need a permit to build a privacy fence in Los Angeles?
In unincorporated areas of Los Angeles County, a building permit is not required for fences under 6 feet in height . However, for fences exceeding this height or located in specific zones, it's essential to check with local authorities for permit requirements.
Will a privacy fence increase my property's value?
A well-designed privacy fence can enhance curb appeal and may make your property more attractive to potential buyers . However, the actual increase in property value can vary based on materials used and neighborhood preferences.
Can a privacy fence be installed on a sloped yard?
Yes, installing a privacy fence on a sloped yard is feasible using methods like racked or stepped fencing to accommodate the terrain . It's advisable to consult with professionals experienced in handling sloped installations to ensure stability and aesthetic appeal.
Have you ever wondered why is it necessary to have pool fencing? Whether it be the height, material used, or other specifications. Actually, a pool fence, also known as a swimming pool enclosure system should be installed to avoid drowning and other accidents.
It is an essential requirement by law that all pools must have this structural obstacle surrounding them which limits access only for adults. The main objective of the barrier is to prevent children from entering unsupervised. Thus preventing any tragedies involving water-related injuries or deaths in general. Let's get some perspective on a complicated issue.
A fun way to spend a sunny afternoon is by hanging out with friends and family near the backyard swimming pool. It could, however, become a tragic site without appropriate safety precautions. It is estimated that the CPSC records 400 drownings annually in residential pools. And 67% of those involve toddlers under the age of three. Each year, thousands of people suffer moderate to severe injuries as a result of submersion.
It is impossible to replace adult supervision with the best pool fence. However, it does help reduce sad statistics such as these: one child drowns every five days and 500 children are injured by pools each day in the United States.
For a safe environment, ensure that under fence clearance is 4 inches max and 2 inches on non-solid surfaces such as gravel.
A standard 4-foot fence provides a comfortable amount of security, but 5 feet offers better protection.
Keep large objects such as pool pumps and planters away from the perimeter of the fence. Handholds or footholds shouldn't exist on the outer side of a fencing system. Current recommendations must be followed for measurements between components in different parts of a fence. It helps you meet safety standards as well as openings since children can climb through them if they are too big.
Install an alarm system on all doors and windows leading from the house to the swimming pool and cover them with safety covers.
Ensure that all pool gates are self-closing, self-latching, and have a safety release mechanism.
The materials of your pool fencing is not specified by code, however, the most popular types on the market include aluminum, glass, PVC, wood, and steel. Movable mesh is convenient for pools with children because it can be opened up to allow adults through but have a barrier that keeps small bodies out at all times. Still, remember though that there may be some differences in clearance requirements between these options so know what you're working with before installing any structure around your pool area.
Related
Wood Fence
Most local building authorities throughout the country have adopted the International Building Code (IBC). For pool fencing regulations, even though the exact details tend to vary from state to state. During the three years, it has been updated. Make sure to follow the version you are using at the time of your project as well!
Most of the people ask that Is it cheaper to make your own fence? So now we will discuss how you can do that by keeping all the restrictions in mind.
Have you considered building a fence, but are unsure whether it should be professionally installed or a DIY project? Keep in mind the following things. While the idea of starting from scratch and getting hands-on experience might sound appealing at first. There is actually quite an investment that goes into building fencing materials. Instead, consider hiring professionals to do the job for you as this will save time and money on labor fees compared with doing it yourself.
In most cases, you can build your own fence for the lowest cost. The money saved from paying a company can be used to buy materials and supplies for building your own fencing system around your property.
Installing your own fence can be a rewarding experience, allowing you to create exactly what you want while being limited only by your imagination and local regulations. You’ll feel pride looking at the finished product knowing that it was all yours. Some companies may not have as many options for materials or styles available so if this is important to you then building yourself might just be the right option!
Installing a fence by yourself takes up so much time and effort. You have to spend your own money on materials. Not just the labor costs that go with hiring someone else to do it for you. While most companies might hire teams of people which speed up installation, you’re looking at some serious hours spent doing hard work alone or with friends if they help out too.
It would be prudent for you to do your research prior to building your own fence, especially if you're new to the field. You will need materials that are the right ones, tools needed, and make sure local regulations don't interfere with property lines.
The input is very simple; there isn't much creativity or engagement in this sentence structure because all of the information provided can easily be found online by doing a quick Google search on how to build fences.
A professional tone is important when communicating with team members and stakeholders, such as in this scenario where you’re selling the idea of hiring a fence installation company. The risk of not having your new fencing properly installed outweighs any initial savings from buying materials yourself. A professional voice will communicate that an expert was hired for their profession rather than someone who had never done it before and might make mistakes down the line. Like if they don't realize how close to an electrical wire or tree root some parts were left after digging up holes!
You may think that installing your own fence will save you money. However, if a professional has been working on the job for several years. They will have installed dozens of fences and know what works best in certain situations. They also probably use higher-quality materials than most homeowners would be able to afford or research properly.
Hiring a professional team to install your fence can also save you time. It only takes one to three days for them to complete the job! Forgot about the hours of back-breaking work it takes to install a fence. Professional installation is just what you need, so let our team take care of that for you instead!
How do you install the easiest fence?
Vinyl fencing installation is much easier when you use no-dig techniques. Now, spend more time with your family or friends and less time on home improvement projects!
The fence must touch the ground, right?
For the majority of applications, metal or wood fences should be installed at least two inches off the ground.
Does your house need to be touched by a fence?
Please do not attach the fence to your house. It can be difficult for you later.
VIEW OUR WORK
LEARN MORE
CONNECT WITH US